Product Quality Inspection Systems
During manufacturing, testing is done to ensure quality and that the part conforms to industry and customer standards. This could include part defects or subsystem issues (such as unacceptable noise or vibration levels) that fail to meet a predetermined criterion.
Quality Inspection
Catching defects BEFORE the product leaves the manufacturing floor reduces manufacturing costs, warranty claims, and keep customers satisfied. At one time, and still in some cases, quality was determined physically (i.e., listening, visual inspection, Etc.) to detect objectional noises like motor noise, brake squeals, belt noise, rattles, and so on. Today manufacturers are replacing highly subjective and error-prone processes with objective physics-based quality inspection. These systems employ industry standards, test data, and jury evaluations as a baseline for determining if a part or assembly passes quality inspection.
Turning Quality into Tangible Metrics
How do these quality inspection systems translate subjective terms like quality into objective PASS/FAIL determination? In the case of noise, the process often begins with a jury evaluation method to determine how people hear sounds. Groups of people rate different sounds using a statistical method – that is, they identify noise that is deemed to be objectionable. That data is then analyzed using psychoacoustics to understand how people perceive sounds and determine an acceptable noise range.
Eliminating Subjective Quality Inspection
Using the jury results, metrics are modeled to score the performance of a product that is being manufactured. At the end of production, products are checked by quality inspection systems and assigned a PASS/FAIL rating. (Listen to this podcast to learn how a leading automotive supplier employs the process.) The process has roots in the 1960s where it was instrumental in the development of rockets and later space shuttle programs. (Listen to this podcast to learn more about this.)
Signalysis is a leading provider of such systems. According to the company’s President and Founder, Neil Coleman, the key is to systematically measure and interpret signals originating from the product or system.
“Suppliers come to us to help ensure quality. In the case of noise inspection, we help by selecting the right measurement sensor, whether it be an accelerometer, vibrometer or microphone. Once these measurements are obtained, the data is analyzed with complex algorithms such as frequency domain, time domain analysis, order domain, and so on. This helps us to create a metric that we can scale and linearize so that limits can be adjusted to what is acceptable to the customer.”

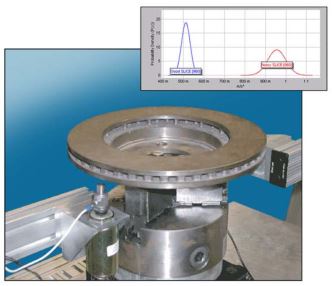
Product Quality Test Systems identify flaws, defects, or nonconformance to customer specifications before a part leaves the production floor.
All of this is pulled together in a software-driven quality inspection system that allows manufacturers to quickly and accurately determine if a motor, gearbox, etc. passes the quality criteria and meets the standards of the industry and customer.
Want to learn more? Contact us here.
